iOS:
In order to configure your account in Zoiper, go to "Settings"->"Accounts" and select Add account.
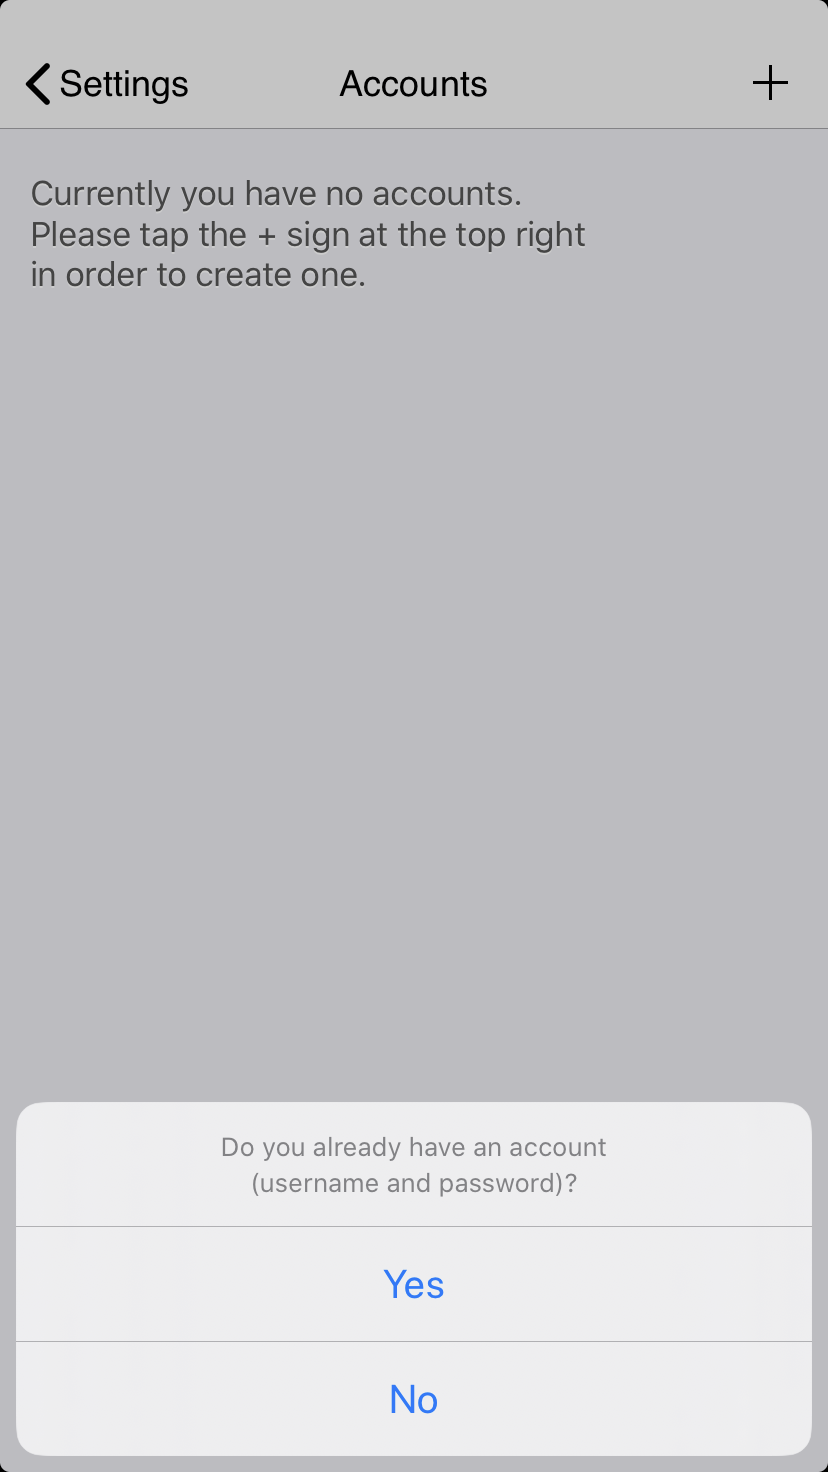
After that select "Yes"(if you already have account) - "Manual configuration". If you select "Select a provider" and your VoIP provider is listed you will just need to enter username and password.
After selecting "Manual Configuration" and choosing the account type (SIP/IAX) you need to fill in the following fields:
Account name - choose a name for your account. This is not related to your VoIP account details.
Host - domain/IP of the VoIP server. Provided by your VoIP provider.
Username - your VoIP account username. Provided by your VoIP provider.
Password - your VoIP account password. Provided by your VoIP provider.
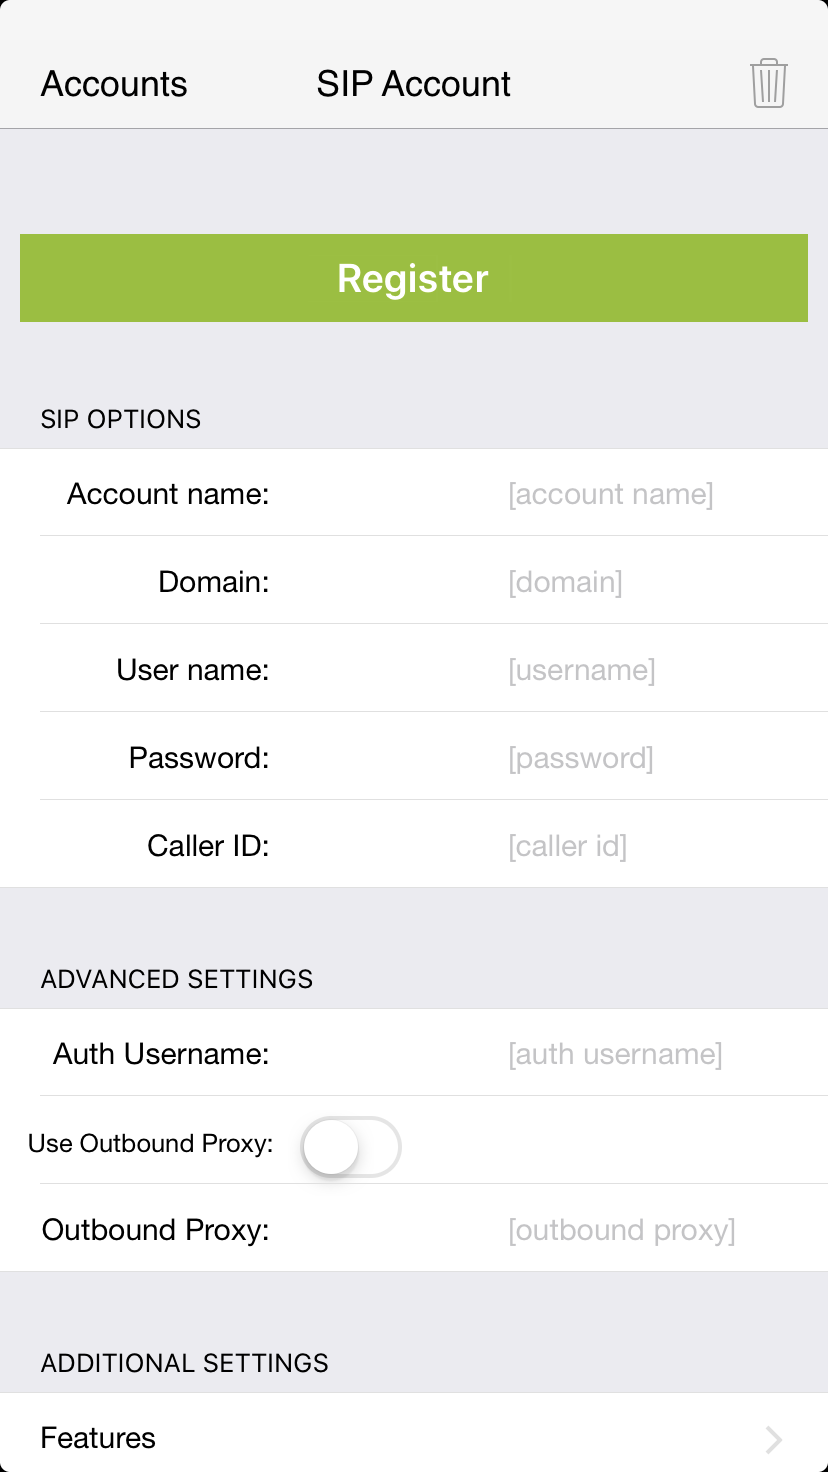
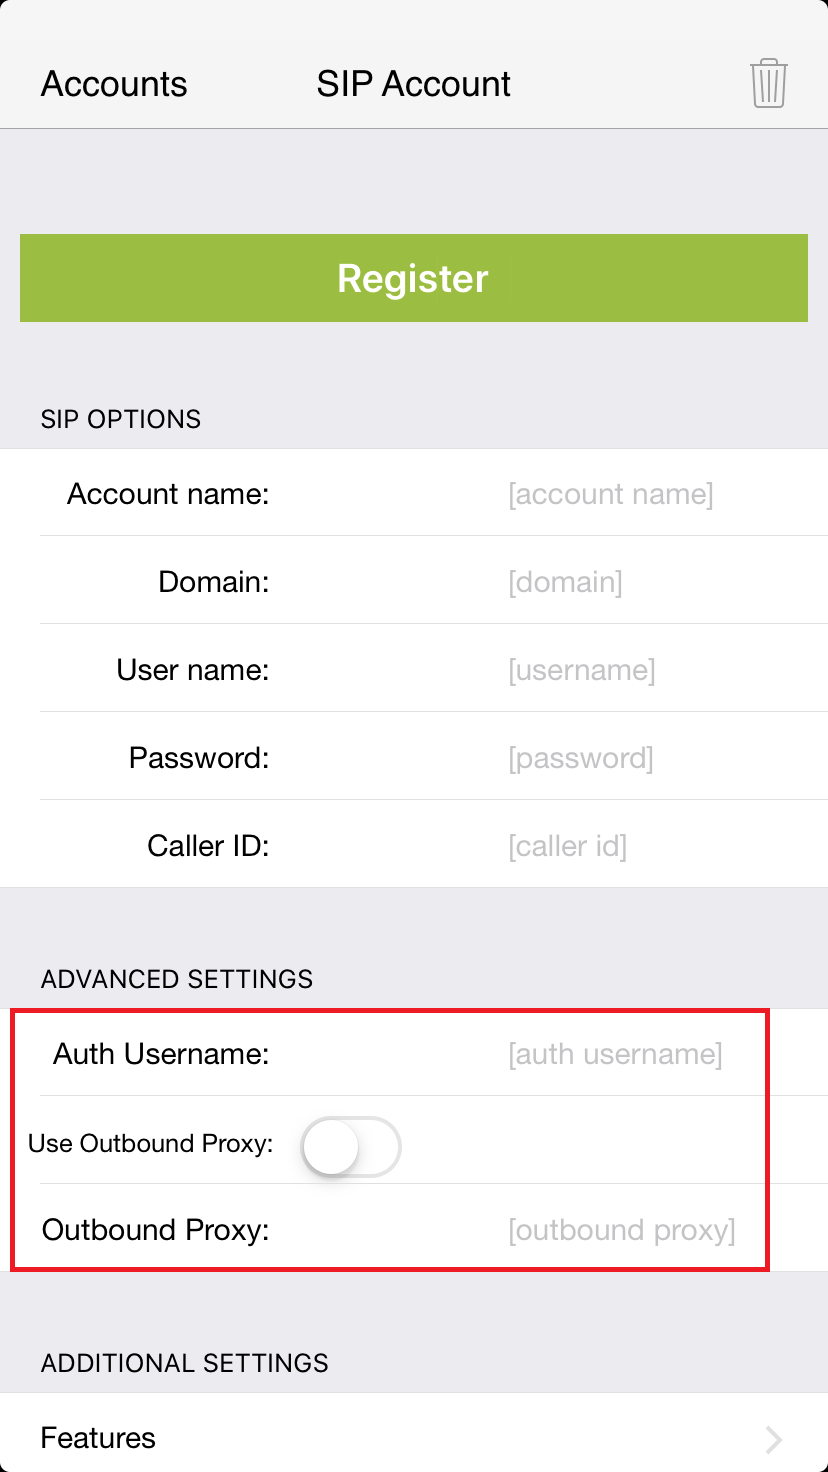
These should be sufficient. If your VoIP provider requires "Authentication username" or "Outbound proxy" you can fill them in.
Android:
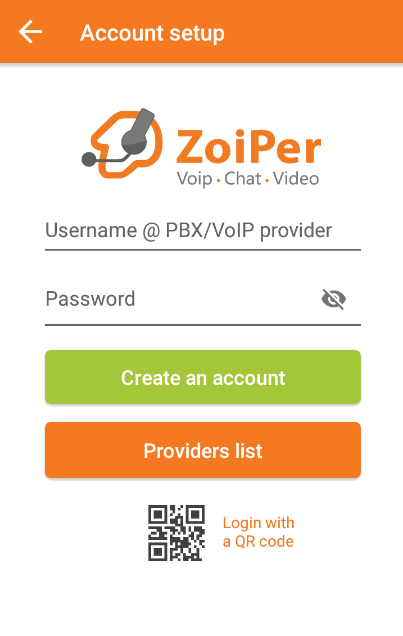
In order to configure your account in Zoiper, go to navigation drawer > "Settings"-> "Accounts" and tap Add account (+) button.
Then you can directly enter your SIP/IAX username and password to 'Create an account', or if you have an account with a listed provider - you can select 'Providers list':
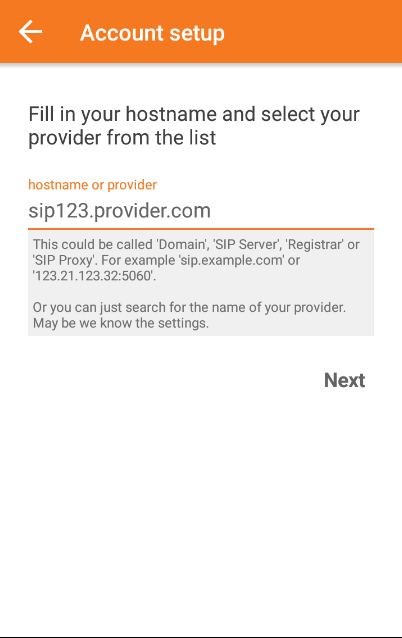
On the next screen you can manually enter the hostname:
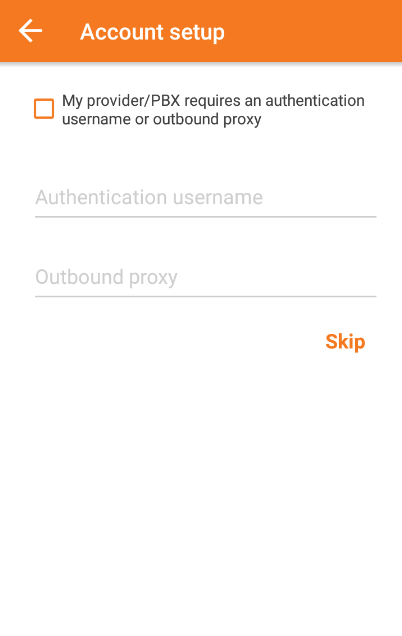
Then you have the option to opt-in for an Authentication username or an Outbound proxy, if your PBX/server or Provider requires these:
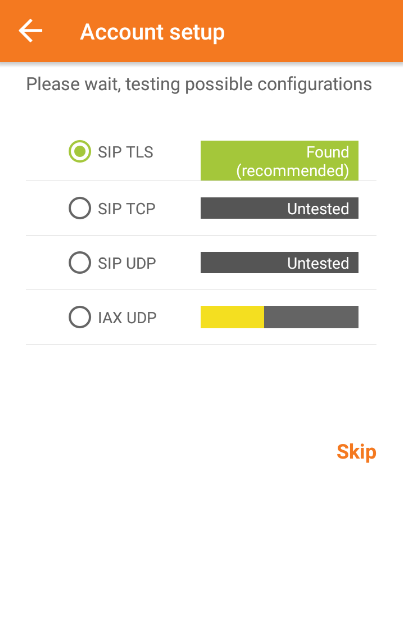
Wait for the automatic configuration or make a manual choice and skip the auto-detection.
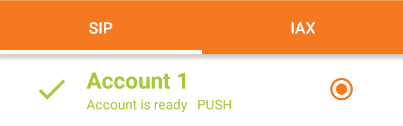
Your account is created and ready to use!
Windows, Mac and Linux:
After you have installed and activated Zoiper5, it is time to move on to the configuration of the server you want to use. This could be a VoIP provider or your office PBX.
You will see a window asking for your Username/ Login and Password.
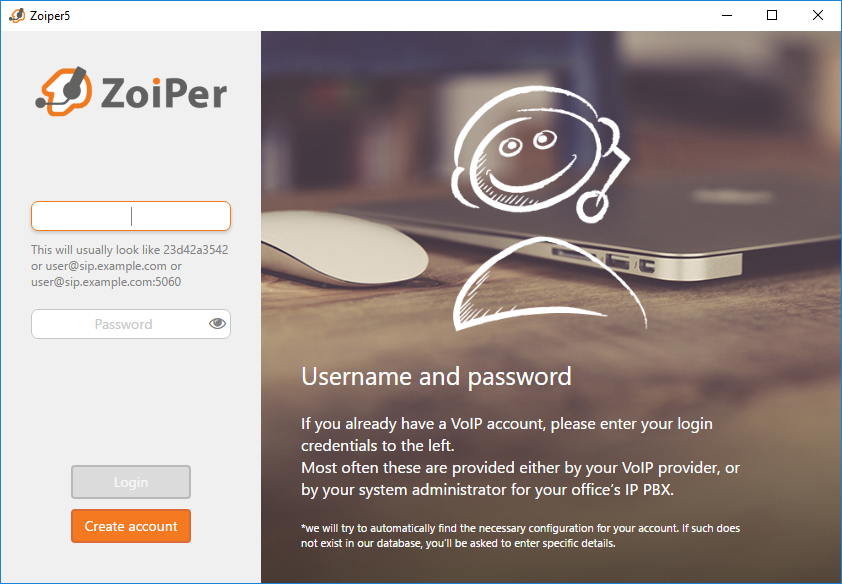
If you already have an account, fill in the username on the first line and the password on the second line. The username could look like:
John.Doe
John.Doe@voip.com
John.Does@voip.com:5060
or
abc123dfg
The password will typically be a random string, usually with a combination of lowercase and uppercase characters and some number like: dH023TPfhx
Note, If you do not have account, click on the "Create Account" button, your current region should be autodetected, select provider and click on the "Sign up" button. Your browser should open and you will be able to create your SIP/IAX account.
Note2, if you have been provided with provisioning credentials from your provider, you just need to click on the "Create Account" button -> search for your provider -> select it and input the credentials which you have been provided with and click "Login". Your account should be now set.
Clicking on the "Login" button will lead you to the next step.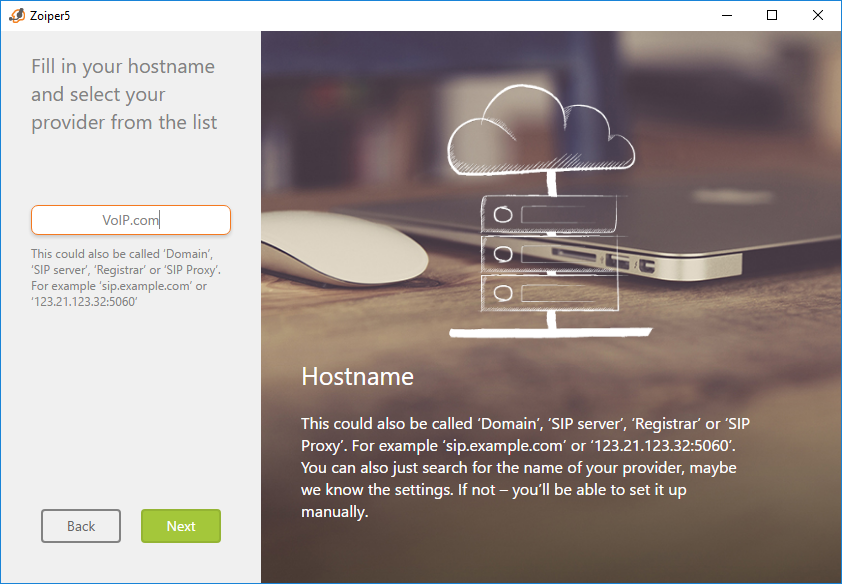
If you have previously filled your username as: username@domain, the hostname of your server will be auto-filled. Otherwise you need to fill it manually.
Click "Next".
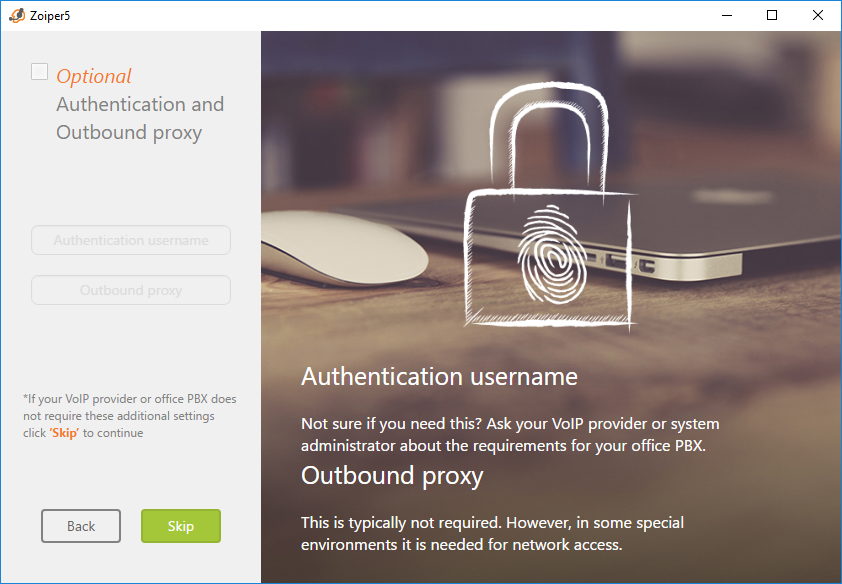
This step is optional. Some VoIP providers however, require that you fill Authentication username or Outbound proxy.
If you have not been provided with such credentials you can skip ahead.
Clicking on the "Skip" button will lead you to the next step where Zoiper will probe for any available transports for your account:
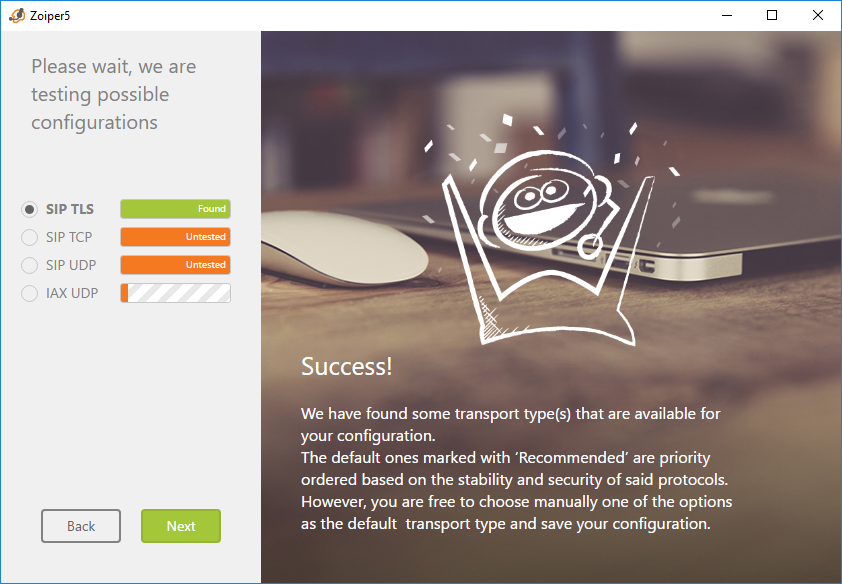
If TLS or TCP is found, they will be selected by default since they are more reliable. However if you have multiple available options, you will be able to choose.
Note, In some cases the account wizard may fail to detect the appropriate transport type, you would need to manually choose the necessary transport based on your service provider requirements and continue.
Clicking "Next" will present you with the Zoiper Audio Wizard where you can configure your headset and camera.
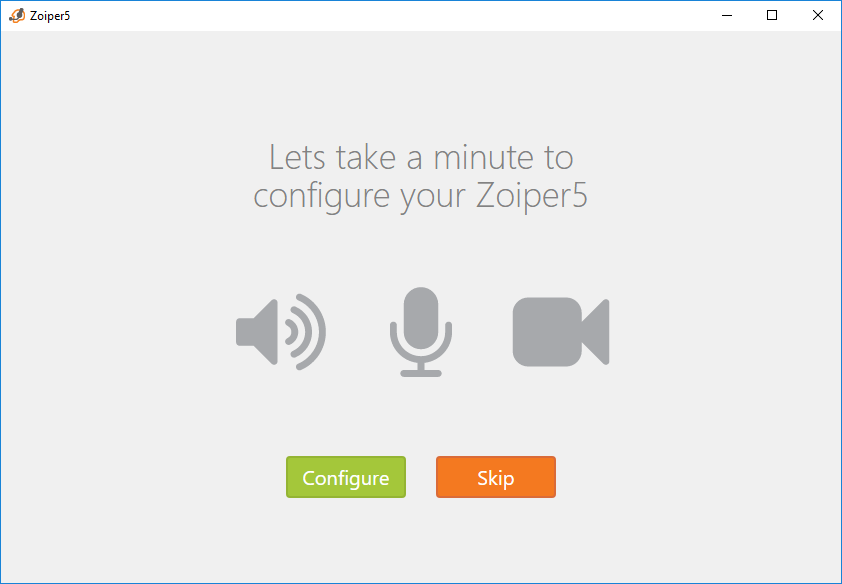
Select "Configure" to set your devices or choose "Skip" if you want to do that later.
Selecting the "Configure" button will present you with an option to test your speakers.
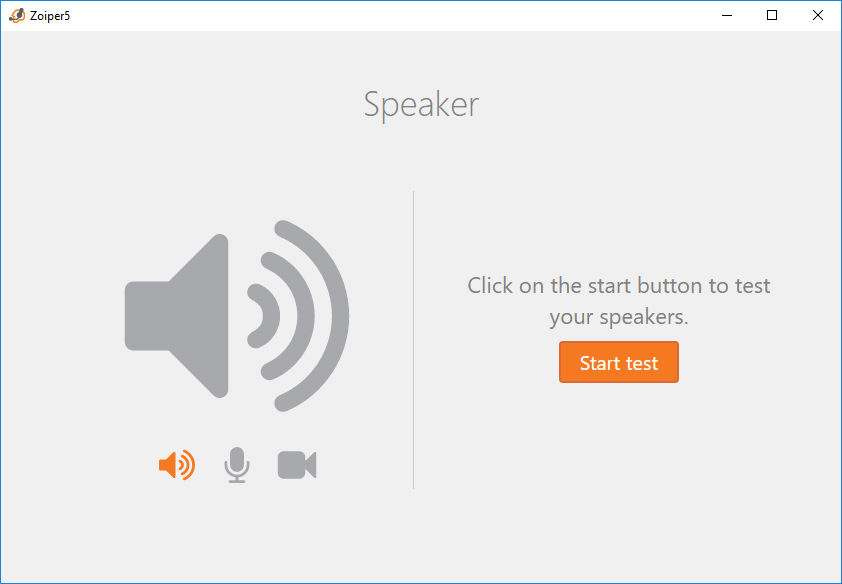
Click "Start test".
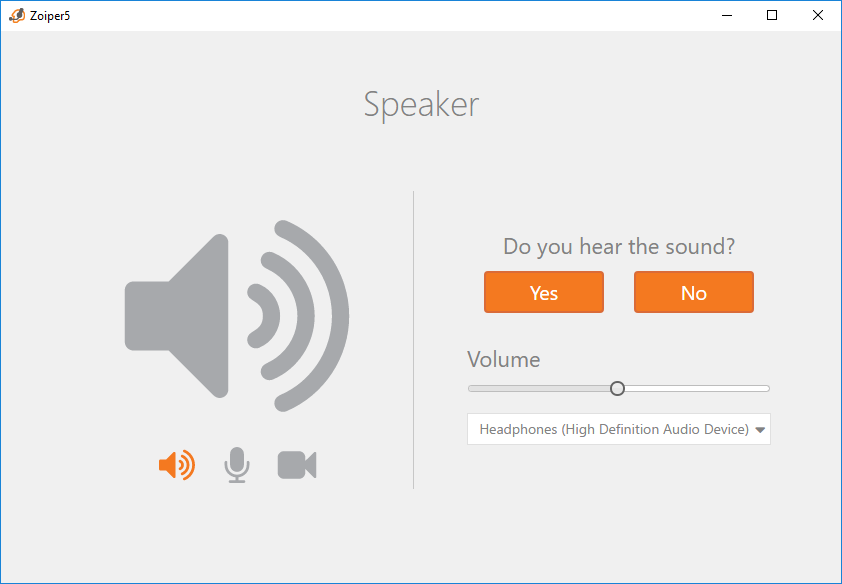
If you hear the test tone click yes, if you click "No" you can choose from the drop-down list other output device, until you find the proper one.
Clicking on the "Yes" button will lead to the microphone test option: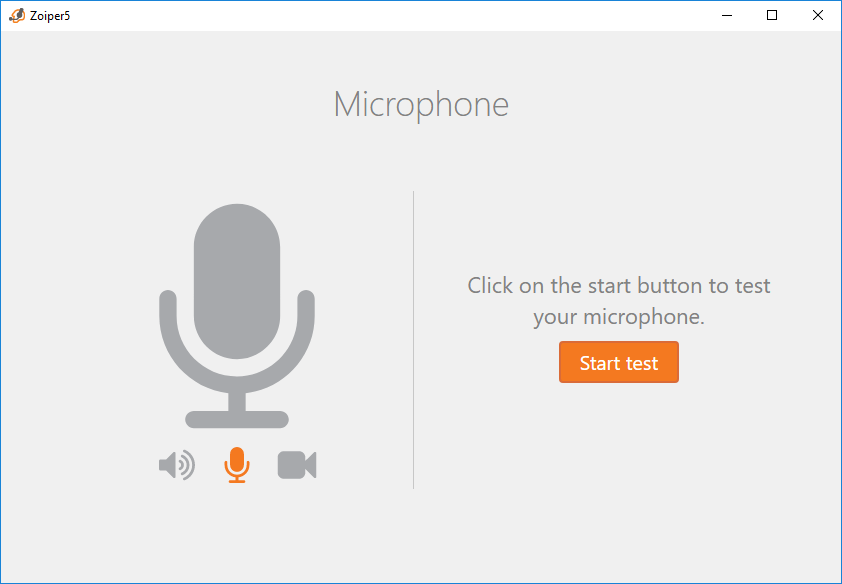
Again, click on the "Start test" option.
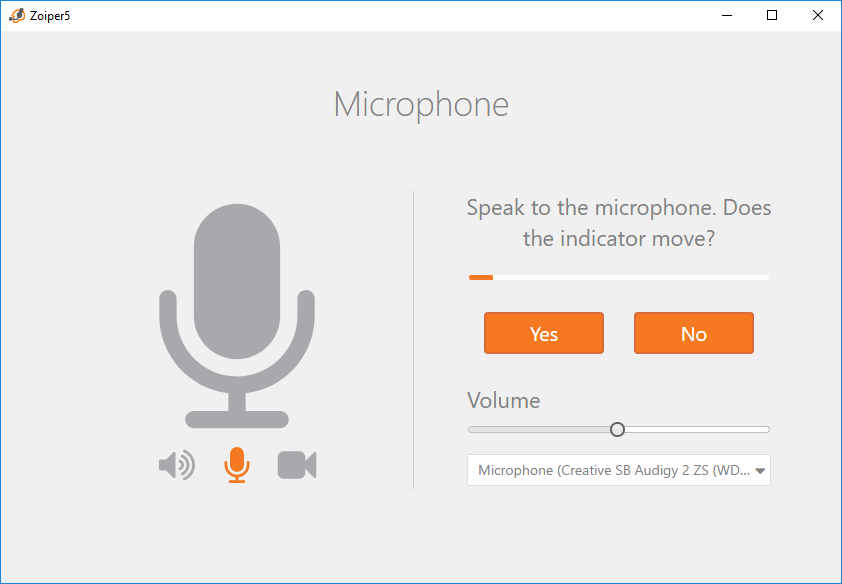
The slider above the "Yes" and "No" buttons will move in accordance to the input detected from your microphone. Try speaking on your microphone and check if the slider reacts according to your voice. If it does, click "Yes". If it doesn't select the button "No" and again you can change the selected microphone from the drop-down list. Repeat the test if needed.
Clicking "Yes" will lead to the Camera test:
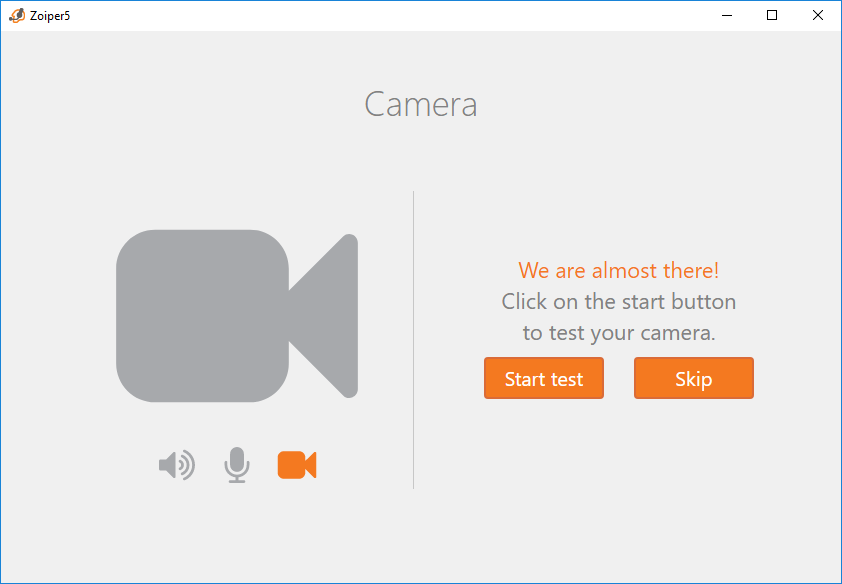
Repeat the tests as you have done previously.
Note, if you cannot see your camera image, make sure that Zoiper is whitelisted in your antivirus or firewall software. The video is streamed with a socket from the localhost. Most issues related to missing video are caused by blocked ports.
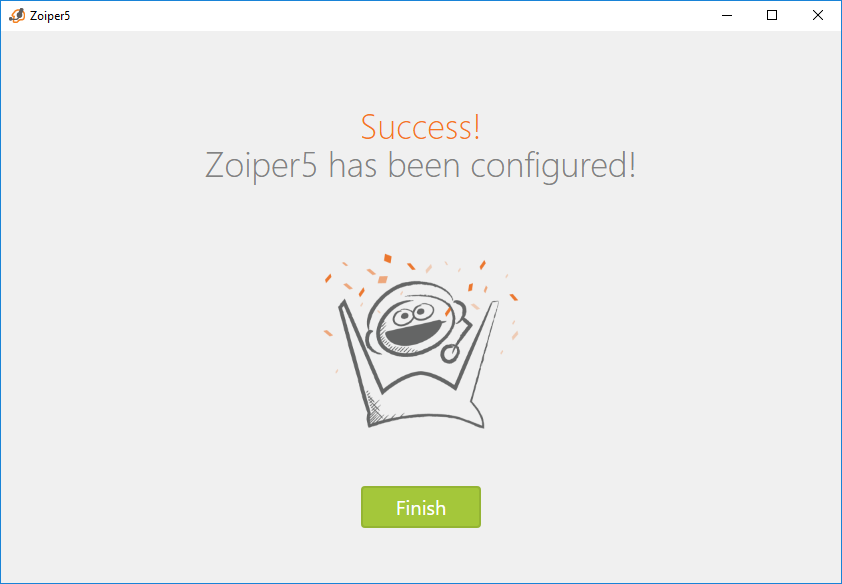
If everything is fine, you are all set.