Which accounts are supported?
Zoiper will work with any PBX server that is compatible with the SIP or IAX protocol.
You can use the VoIP providers list or setup your account manually.
Manual configuration
In order to connect to your telephone system, you will need to know:
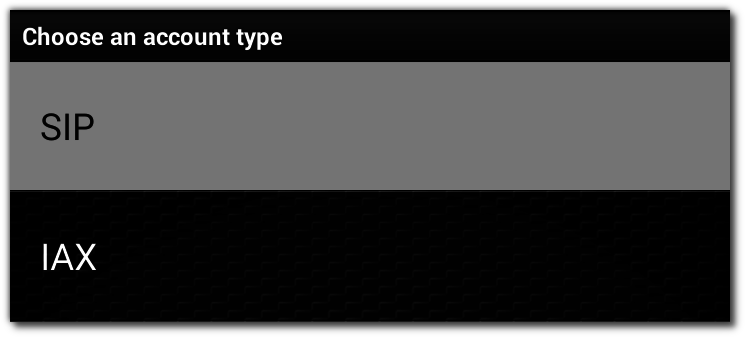
Account type - it can be SIP or IAX
Hostname - It may look like sip.example.com or an ip address. It is often named domain or registrar.
The default SIP port is 5060. In case your SIP account needs to be configured with a different port than 5060, you will need to add it at the end of the hostname, separated with : like this:
Username – this is the username for your account.
Password – this is the password for your account.
Depending on the type of PBX, you may need to use an outbound proxy.
In case it's a must, your provider should have sent you this information as well.
If you do not know all the details for your account, request them from your VoIP provider.
Configuring your account:
Start Zoiper for Android, click "Config", select "Accounts" and then "Add account”.

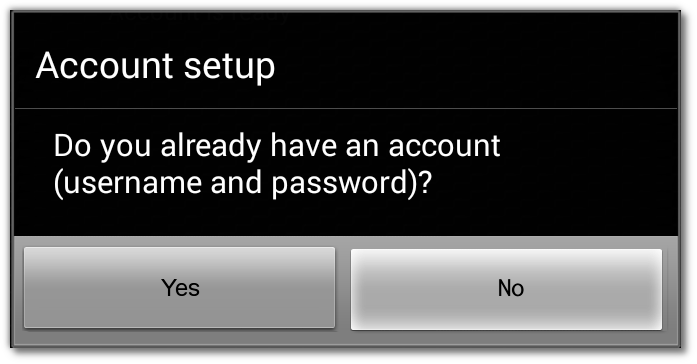
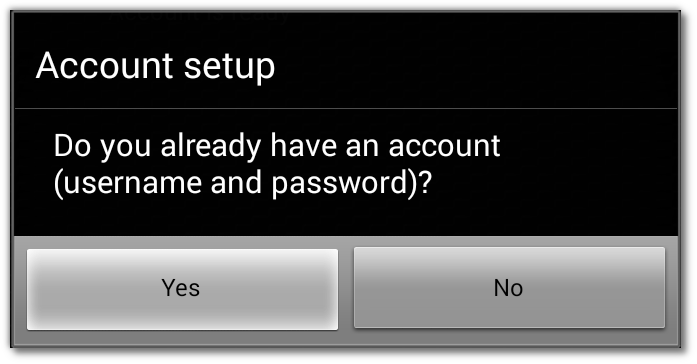
When you see the question "Do you already have an account?" select "Yes".
Click "Manual Configuration”.

If you do not know the type of your account, select SIP.
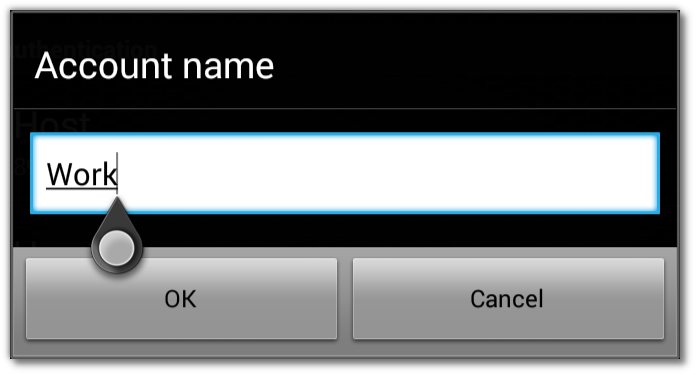
First you need to enter a name for your new account in the "Account name" field.
Enter any name that will help you to recognize the account.
Then fill in the account details in the appropriate fields.

Click "Save". Now you will see a list with all your accounts, including the one you just created.
In about 30 seconds a green checkbox will appear in front of the account name.

Now you are ready to make calls!
Using the VoIP providers list to configure an already existing account
Start Zoiper for Android, click "Config", select "Accounts" and then "Add account”.
When you see the question "Do you already have an account?" select "Yes".
Click "Select a provider”.
You will be redirected to our reputable VoIP providers list.
Find your provider, then click on "Configure Zoiper for use with this provider”.
Fill in the credentials for your account.
You are now ready to make your first call!
Using the VoIP providers list to subscribe for a new account
Start Zoiper for Android, click "Config", click "Accounts", then click "Add account”.
When you see the question "Do you already have an account?" select "No".
You will be redirected to our reputable VoIP providers list.
When you select a provider, you will see a menu.
There you can find the price list (Call rates) or a link to the signup page on the provider's website.
After you sign up with the provider, they will send you the details for your new account by email.
Once you receive it, click on "Configure Zoiper for use with this provider”, then fill in the credentials you just received.
You are now ready to make your first call!
Hints:
- Always use TCP instead of UDP when possible.
- Your account does not register? Try Troubleshooting
- There is an error message? Check the most common informational and error messages.
- Troubles with voice menus? Find more about DTMF tones.
- You can select which networks to use:
Run Zoiper, go to Config -> Advanced -> Supported networks